










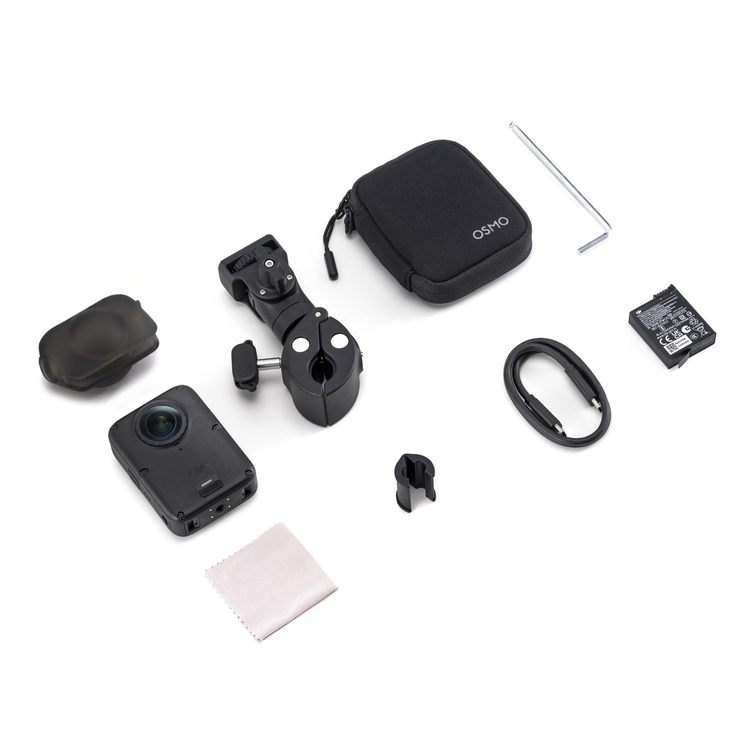
- Dimensions
- 61×36.3×81 mm (L×W×H)
- Weight
- 183 g
- Waterproof
- 10 m without the Waterproof Case, 50 m with the Waterproof Case
- Data was collected in a controlled water pressure environment in a DJI laboratory and should be taken as reference only. Actual performance may vary due to the specific diving environment and product condition. Before use, please ensure the battery compartment cover and USB-C port cover are securely closed. Osmo 360 II has an IP68 waterproof rating per GB/T 4208-2017 and IEC 60529-2013. Do not use the camera in hot springs or extreme underwater environments, or let it come into contact with corrosive or unknown liquids. The camera alone is waterproof to a depth of 10 meters, but due to the convex fisheye lens design, underwater light refraction may cause image distortion and stitching errors. Therefore, it is not recommended to use the camera without the Waterproof Case for underwater shooting. Osmo 360 Invisible Waterproof Case is sold separately. When using the Osmo 360 Invisible Waterproof Case underwater, the safe stitching distance is 1 m.
- Number of Microphones
- 4
- Touchscreens
- Size: 2.0 inches
- Resolution: 314×556
- Brightness: 800 cd/m²
- Supported SD Cards
- microSD (up to 1 TB)
- Recommended microSD Cards
- Recommended Models:
- Kingston CANVAS Go! Plus 64GB U3 A2 V30 microSDXC
- Kingston CANVAS Go! Plus 128GB U3 A2 V30 microSDXC
- Kingston CANVAS Go! Plus 256GB U3 A2 V30 microSDXC
- Kingston CANVAS Go! Plus 512GB U3 A2 V30 microSDXC
- Kingston CANVAS Go! Plus 1TB U3 A2 V30 microSDXC
- Lexar Professional SILVER PLUS 64GB U3 A2 V30 microSDXC
- Lexar Professional SILVER PLUS 128GB U3 A2 V30 microSDXC
- Lexar Professional SILVER PLUS 256GB U3 A2 V30 microSDXC
- Lexar Professional SILVER PLUS 512GB U3 A2 V30 microSDXC
- Lexar Professional SILVER PLUS 1TB U3 A2 V30 microSDXC
- Sensors
- Dual 1/1.1-Inch Square CMOS Sensors
- Aperture
- f/1.9
- ISO Range
- 100-51200
- Electronic Shutter Speed
- Photo: 1/8000s to 30s
- Video: 1/8000s to the limit of frames per second
- Max Photo Resolution
- Panoramic Photo:
- 2:1, 15520×7760 (120 MP)
- Single-Lens Photo:
- 4:3, 6400×4800 (30.72 MP)
- Panoramic Video
- 8K: 7680×3840 @ 24/25/30/48/50/60fps
- 6K: 6000×3000 @ 24/25/30/48/50/60fps
- Panorama - SuperNight
- 8K: 7680×3840 @ 24/25/30/48/50/60fps
- 6K: 6000×3000 @ 24/25/30/48/50/60fps
- Panorama - Selfie Mode
- 4K: 3840×3840 @ 25/30/50/60fps
- 3K: 3000×3000 @ 25/30/50/60fps
- Panorama - Spotlight Follow
- 4K @ 24/25/30fps
- 2.7K @ 24/25/30fps
- Panorama - Slow Motion
- 4K: 3840×1920 @ 100/200/240fps
- Panorama - Timelapse
- Hyperlapse
- 8K @ 25/30fps: Auto/×2/×5/×10/×15/×30
- Timelapse
- 16K @ 25/30fps
- 8K @ 25/30fps
- Modes: Clouds (10 mins/2s), Sunset (1 hour/3s), Custom
- Custom Intervals: 2/3/4/5/6/8/10/15/20/25/30/40s, 1/2/5/30/60 mins
- Duration: 5/10/20/30 mins, 1/2/3/5 hours, 8
- Panorama - Vortex
- 8K: 7680×3840 @ 100/120fps
- 6K: 6000×1500 @ 180/200fps
- Single Lens - Video
- 4K (4:3): 3840×2880 @ 25/30/50/60fps
- 4K (16:9): 3840×2160 @ 25/30/50/60fps
- 2.7K (4:3): 2688×2016 @ 25/30/50/60fps
- 2.7K (16:9): 2688×1512 @ 25/30/50/60fps
- Single Lens - SuperNight
- 4K (4:3): 3840×2880 @ 25/30fps Boost Video
- 4K (16:9): 3840 × 2160 @ 25/30fps Boost Video
- 2.7K (4:3): 2688×2016 @ 25/30fps Boost Video
- 2.7K (16:9): 2688×1512 @ 25/30fps Boost Video
- Single Lens - Boost Video
- 4K (1:1): 3840×3840 @ 25/30/50/60fps
- 4K (4:3): 3840×2880 @ 25/30/50/60/100/120fps
- 4K (16:9): 3840×2160 @ 25/30/50/60/100/120fps
- 4K (9:16): 2160×3840 @ 25/30/50/60/100/120fps
- 2.7K (1:1): 2688×2688 @ 25/30/50/60fps
- 2.7K (4:3): 2688×2016 @ 25/30/50/60/100/120fps
- 2.7K (16:9): 2688×1512 @ 25/30/50/60/100/120fps
- 2.7K (9:16): 1512×2688 @ 25/30/50/60/100/120fps
- Stabilization
- EIS:
- RockSteady 3.0
- HorizonSteady
- In Panoramic Video mode, you can choose Stabilization mode when exporting via DJI Mimo app or DJI Studio. In Single-Lens mode, HorizonSteady is only supported for regular flat videos with a standard field of view (16:9, distortion-corrected) at frame rates up to 60fps; in Single-Lens Boost Video mode, HorizonSteady is only supported for videos at frame rates up to 60fps.
- Pre-Rec
- Pre-Recording Duration: 5/10/15/30 s, 1/2/5 mins
- Max Video Bitrate
- 220Mbps (600Mbps for 16K 360° Timelapse Video)
- Supported File System
- exFAT
- Photo Format
- JPEG, RAW
- Video Format
- OSV, MP4 (HEVC)
- Built-in Storage Capacity
- 128GB built-in storage (105GB available); storage can be expanded via microSD card.
- Audio Recording
- 48 kHz 16-bit; AAC
- Safe Stitching Distance
- = 75 cm
- When using the Osmo 360 Invisible Waterproof Case underwater, the safe stitching distance is 1 m.
- Type
- Li-ion 1S
- Capacity
- 2150 mAh
- Energy
- 8.3 Wh
- Voltage
- 3.86 V
- Operating Temperature
- -20° to 45° C (-4° to 113° F)
- Charging Temperature
- 5° to 40° C (41° to 104° F)
- Operating Time
- Supports up to 100 minutes of 8K/30fps panoramic video recording
- Measured under laboratory conditions at 25° C (77° F), while recording 8K/30fps 360° video, with Wi-Fi off, Gesture Control off, Voice Control off, Editing Assistant off, and the screen off. Data was collected in a controlled environment and should be taken as reference only. When activating and using Osmo 360 II in the EU and the UK, actual battery life may vary due to local regulations on product operating temperatures. Refer to the actual user experience.
- Wi-Fi Operating Frequency
- 2.400-2.4835 GHz
- 5.150-5.250 GHz
- 5.725-5.850 GHz
- Wi-Fi Protocol
- Wi-Fi 6
- 802.11 a/b/g/n/ac/ax
- Wi-Fi Transmitter Power (EIRP)
- 2.4 GHz: < 20 dBm (CE/SRRC/MIC)
- 5.1 GHz: < 23 dBm (CE/SRRC/MIC)
- 5.8 GHz: < 23 dBm (SRRC), < 14 dBm (CE)
- Bluetooth Operating Frequency
- 2.400-2.4835 GHz
- Bluetooth Transmitter Power (EIRP)
- < 13 dBm
- Bluetooth Protocol
- BLE 5.4, BR/EDR
As an international traveller you are entitled to bring a certain amount/value of goods that are free of Customs duty and exempt Goods and Services tax (GST) into New Zealand. This is called your duty free allowance and personal goods concession. It is important to review these for any purchases you make on The Mall.
Your duty free allowance entitles you to bring into New Zealand the following quantities of alcohol products free of customs duty and GST provided you are over 17 years of age. You do need to be 18 years or over to purchase.
- Up to six bottles (4.5 litres) of wine, champagne, port or sherry or
- Up to twelve cans (4.5 litres) of beer
- And three bottles (or other containers) each containing not more than 1125ml of spirits, liqueur, or other spirituous beverages
Goods other than alcohol and tobacco, whether purchased overseas or purchased duty free in New Zealand, that have a combined total value not exceeding NZ$700 may also be brought as part of your personal goods concession.
When travelling overseas there are legal limits on the amount of duty free alcohol and other goods you can take with you. These amounts will vary depending on the country you are flying into. We always recommend you check the latest limits and exemptions.
Your order can be picked up at an Auckland Airport Collection Point. There is one in departures and one at arrivals in the international terminal. Alternatively, if you are arriving between 11pm and 6am you will be able to collect your order from our lockers. See map
Please bring your order confirmation email and your passport. If you are collecting from lockers you will have been sent an email with your access code, be sure to have this on you in order to collect your order.
If you’re departing Auckland Airport, we recommend that you come to the Auckland Airport Collection Point at least 60 minutes before your flight. If you miss your pickup time or your flight details have changed please let us know as soon as possible.
When you collect your order you will have the opportunity to inspect the items and sign for them.
If you need to return an item, our Collection Point team are there to help you. If you are collecting after hours please return the item to your locker and our team will be in touch as soon as possible. You may also like to view our Returns & refunds which provides information on how this works and outlines the individual retailer's returns and refunds policies.
After Hours Collections
If your order needs to be collected after the Auckland Airport Collection Point desk is closed, your order will be placed in the lockers next to the desk. All the details you will need to collect your order will be provided in your Order Confirmation and Ready to Collect Email.